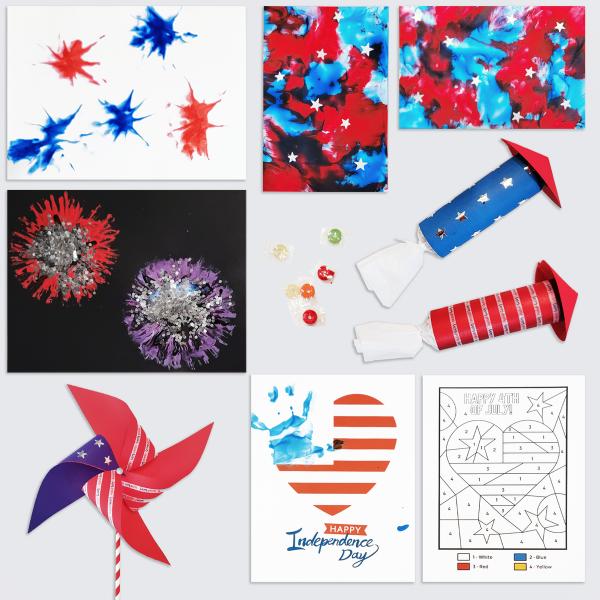
The 4th of July is a great time to celebrate our country's independence with patriotic crafts for kids. From the majestic stars and stripes to the vibrant colors that represent our shared heritage, these patriotic crafts for kids offer you and your little ones a chance to bond, learn, and create cherished memories together. So gather all of your red, white, and blue supplies—here are a few art ideas that kids of all ages can enjoy!
You might also like these!


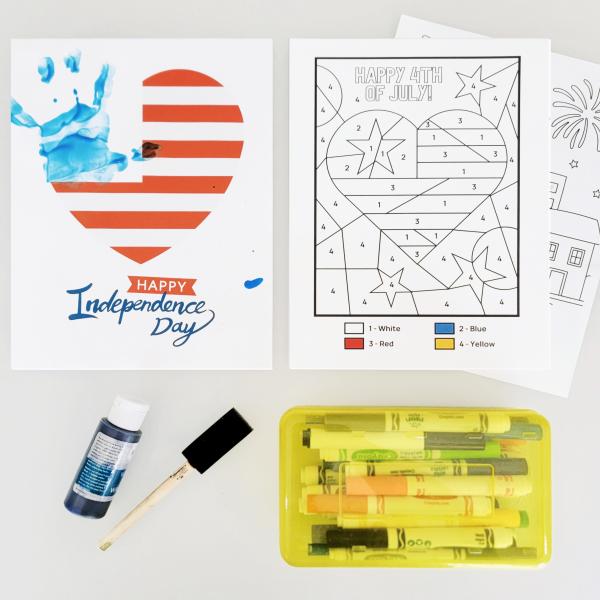
Looking for a quick way to fill some time this summer? This 4th of July activity pack has plenty of fast and fun coloring pages, simple crafts, and more! Your little ones will love adding their painted handprints to the American flag. They can also work on their math skills with the color-by-number page. Just click the download button below and you’ll automatically get a PDF to print.
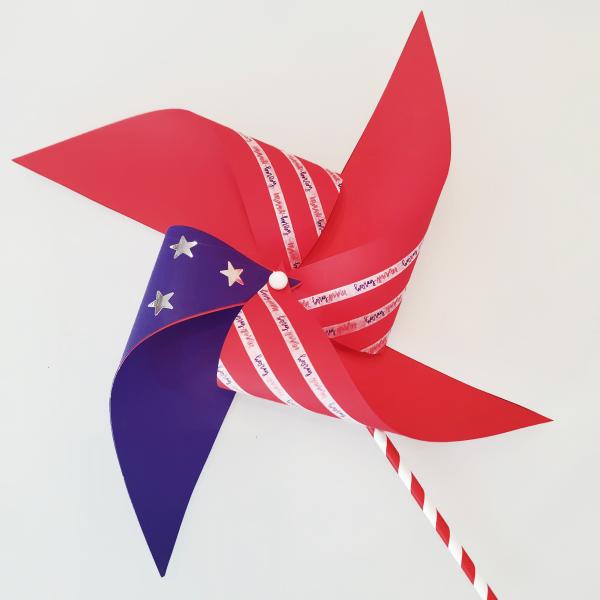
With our FREE printable template, this pinwheel turns into a creative patriotic craft for kids!
What You’ll Need:
- Printable pinwheel template
- Scissors
- Crayons
- Colored pencils or markers
- Push pin
- Small button or bead
- Pencil with eraser
What You’ll Do:
1. Download and print the FREE pinwheel template.
2. Decorate both sides of the pinwheel paper. For a patriotic feel, use red, white, and blue. Draw stars or fireworks too!
3. Cut out the template so you have one big square. Then cut along each of the dotted lines to create four diagonal slits.
4. You’ll have eight points on the pinwheel, two in each section of paper. Choose one tip and bring it to the center of the pinwheel, but don’t crease it. Hold it there with one hand. Going around the square, skip one point. Grab the next point and take it to the center, but don’t crease it. Hold it there. Continue around the square until you’ve folded in every-other point.
5. Push the pin through the points that are at the center point. Go through the paper and place your bead/button on the backside of the pin. Then press the pin into the pencil’s eraser.
6. The pinwheel is ready to spin!
Kids can paint with shaving cream? Yes, they can! Little ones will love the messy process of creating these shaving cream fireworks!
Note: You may want to do this project outside!
What You’ll Need:
- Sheet pan or art tray
- A can of foam shaving cream
- Small scrap piece of cardboard
- Red and blue liquid watercolors or food coloring
- Toothpicks or cotton swabs
- Cardstock
What You’ll Do:
1. Place the sheet pan or art tray on your work surface. Squeeze a good layer of the shaving cream into it.
2. Use the scrap piece of cardboard to level off the shaving cream.
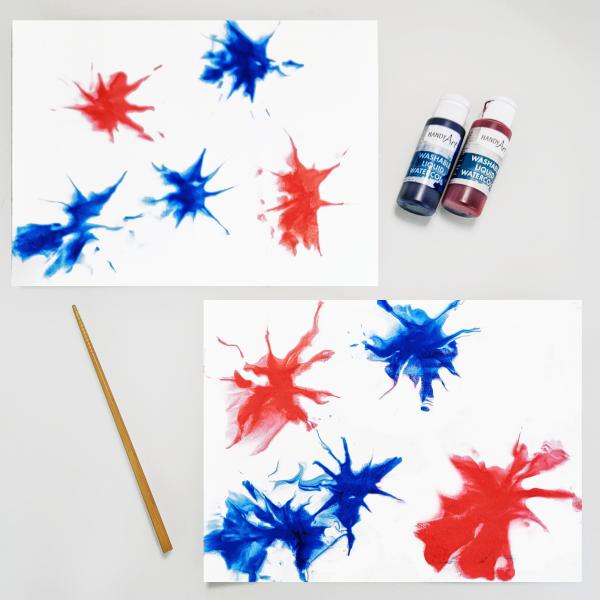
3. Drop red and blue food coloring or liquid watercolors into small pools on top of the shaving cream.
4. Use the toothpicks or cotton swabs to pull from the center to the outside of each pool of color. This will create the shape of a firework!
5. Lay the paper on top of the shaving cream. Gently press it to make sure the paper makes contact with the shaving cream.
6. Pull up the paper and set it aside to dry.
7. Make more prints! Or, wipe out the tray and repeat the process with new colors.
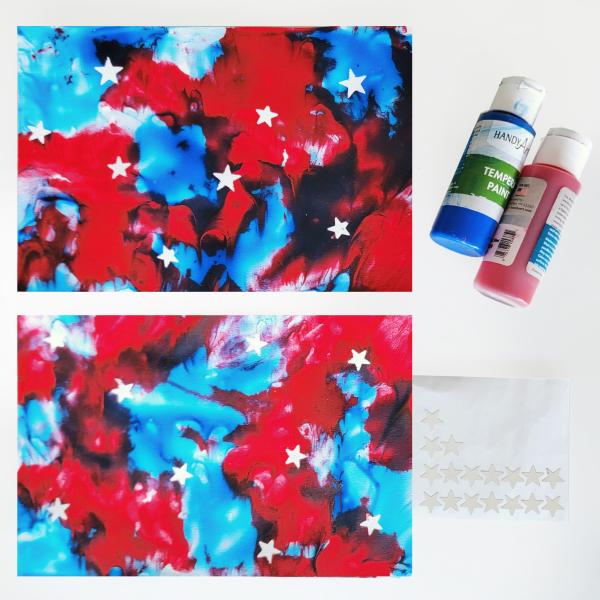
This is an open-ended patriotic craft for kids with tons of potential. Make a flag, fireworks, or an abstract design!
What You’ll Need:
- Star stickers of various sizes
- Cardstock
- Tempera paint
- Paintbrush
- Paint palette or paper plate
What You’ll Do:
1. Place the stickers on the cardstock in whatever way you’d like.
2. Pour red and blue paint onto a paper plate. Paint directly over the stickers. Kids might even want to finger paint for this step!
3. Set the piece aside to dry. When it is dry, remove the stickers and the white paper underneath will be revealed!
4. If you’d like to do more paint resist, try using a white crayon or painter’s tape on the cardstock.
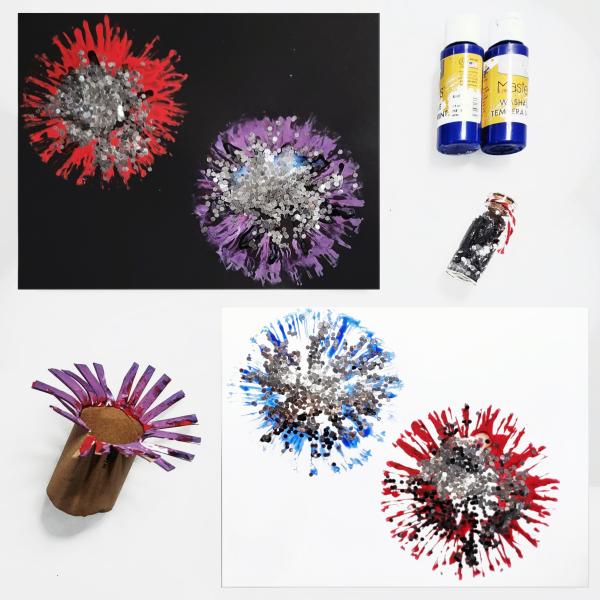
Grab a paper towel roll from your recycling bin and turn it into a fireworks stamp!
What You’ll Need:
- Paper towel rolls
- Scissors
- Tempera paint
- Glitter
- Paper plates
- Cardstock
- Ruler
- Pencil
What You’ll Do:
1. Cut each paper towel roll in half. You’ll need at least three rolls. Measure one inch up from the bottom of each one and draw a line. Repeat a few times around the roll and then draw one continuous line.
2. Starting at the bottom of the roll, cut several strips up to the one-inch line. Bend them back slightly so they’ll press flat against the paper. They should look like fireworks!
3. Pour one color of paint into each paper plate. Use red, white, and blue for a patriotic effect!
4. Press one paper towel firework into each color. Then stamp them onto your paper! You can layer them, turn the stamps sideways, lightly stamp or stamp firmly, or any other variation you’d like!
5. Sprinkle glitter on top for a finishing touch.
6. Let the piece dry and then display it!
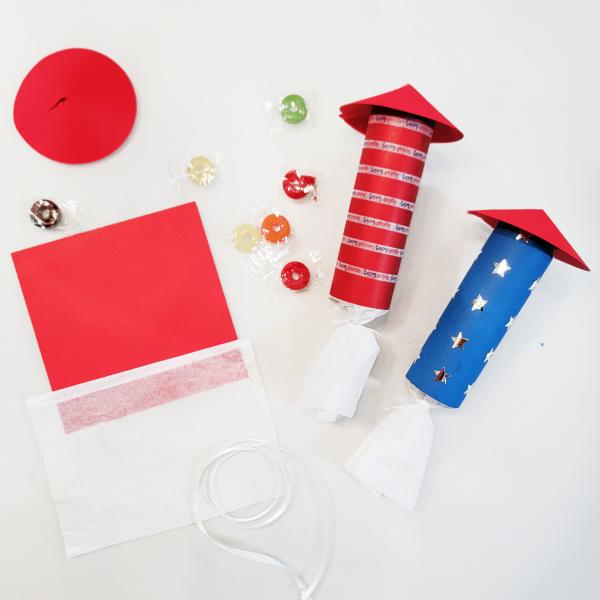
Here’s another project that uses recycled paper towel rolls. This patriotic craft is a little more challenging, but it's sure to be a hit with older kids!
What You’ll Need:
- Paper towel roll
- Decorative paper or cardstock and decorating supplies
- Ruler
- Scissors
- Transparent tape
- Red, white, or blue tissue paper
- Yarn or twine
- Hot glue (ADULT USE ONLY!)
- Candy or other small treats
What You’ll Do:
1. If you’re using cardstock, begin by decorating one side of it.
2. To make the body of the rocket, first measure the height and length of the paper towel roll. Cut the cardstock or decorative paper to match. You can also roll the paper towel roll in the paper, mark it, and cut on the lines.
3. Fold a piece of tissue paper in half and cut it so that it measures about 5 inches x 5 inches. Place the folded edge of the tissue paper near the bottom edge of the backside of the decorative paper. Tape it place. Then tape the decorative paper to the paper towel roll. The tissue paper is the “fire” coming out of the bottom of the rocket! Cinch the tissue paper near the bottom of the paper towel roll by tying a piece of yarn or twine around it.
4. Now you’ll make the cone for the top of the rocket. Once again, if you are using cardstock you’ll want to decorate it first. Then trace a four-inch circle on the paper and cut it out. Cut one slit in the circle, going from the edge to the center of the circle. Overlap the edges of the slit to create a cone shape. Tape the paper in place.
5. Fill your rocket with candy or trinkets!
6. Place a line of hot glue on the top edge of the rocket and press the cone into it. This will seal the surprise inside!
7. Share your rockets with friends or family members!